
Learn how to clean a KitchenAid dishwasher quickly and easily from experts! Find out easy, effective ways to keep your dishwasher in perfect shape.
People who have a KitchenAid dishwasher like how fast and easy it is to wash dishes. But to keep this ease of use for years, your device needs to be serviced once a year. If you don’t clean your dishwasher, it could get smelly, not work well, or even break. This step-by-step guide will help you clean your KitchenAid dishwasher quickly and easily.
Find out how to clean stainless steel, keep machines clean, and take care of things made of stainless steel. Find out how to clean the filter and take care of your dishwasher so it works at its best. Follow these tips to keep your KitchenAid running smoothly.
The Importance of Keeping a KitchenAid Dishwasher Clean
It is very strong, and it can clean anything, from big pasta plates to fine dinnerware. Like any high-performance machine, it can break down if you don’t take care of it. Keeping it clean not only keeps bad smells from coming into the kitchen, but it also keeps your dishwasher’s cycle running smoothly, which saves water and electricity. Learn how to clean stainless steel appliances, like the filter in the dishwasher, the right way to keep your KitchenAid appliances clean and to take better care of your dishwasher overall.
Understanding Your KitchenAid Dishwasher
Maintaining a clean and efficient KitchenAid dishwasher is essential for a hygienic kitchen and keeping your dishes sparkling. Before you start cleaning, understanding the different parts and their functions is crucial. Food residue, grime, and organic waste can easily build up in hidden areas of your dishwasher, potentially leading to unpleasant odors and even malfunctioning. Did you know, studies reveal that 80% of dishwasher problems stem from inadequate cleaning and maintenance. This emphasizes the importance of proper dishwasher care. Learn how to clean a KitchenAid dishwasher for optimal performance and longevity.
This guide will not only equip you with the knowledge of how to clean stainless steel, which is a common material in KitchenAid appliances, but also delve into essential practices for maintaining dishwasher hygiene, keeping it clean, and employing effective dishwasher cleaning techniques.
Here’s why regular cleaning and maintenance are crucial:
- Extends the lifespan of your appliance: Studies have shown that dishwashers cleaned and serviced regularly can last up to 50% longer. This will save a lot of money all through the year.
- Improves cleaning performance: A clean dishwasher ensures optimal cleaning power, leaving your dishes spotless and bacteria-free.
- Prevents unpleasant odors: Regularly cleaning the filter and other components helps eliminate built-up food particles and grease, preventing the development of foul odors in your kitchen.
- Reduces the risk of malfunction: Proper maintenance keeps your dishwasher functioning smoothly and efficiently, reducing the likelihood of breakdowns and potential repair costs.
By incorporating these practices into your regular kitchen cleaning routine, you can ensure your KitchenAid dishwasher operates efficiently, keeps your dishes sparkling clean, and extends its lifespan for years to come.
Components of a KitchenAid Dishwasher
- Interior: This is where magic happens, where hot water and detergent combine to clean your dishes.
- Spray Arms: These spinners are tasked with distributing water and detergent throughout the wash cycle.
- Filter: It strains food particles which are removed after each cycle.
- Seals and Gaskets: Help with the dishwasher’s water-tightness.
- Control Panel: The command center for your cleaning needs.
How It Works
Dishwashers are amazing inventions that save us a lot of time and effort by washing dishes for us. However, how do these workhorses get the food so clean? Here’s how to do it and how to clean a KitchenAid dishwasher at the same time. Even though the general cleaning process may be the same for all dishwasher types, knowing how your KitchenAid model works can help you get the best cleaning results.
- Filling and Heating:
- The user selects a desired wash cycle.
- The dishwasher’s water inlet valve opens, allowing water to enter the tub. (Typical water usage: 4-6 gallons)
- The heating element activates, raising the water temperature to the pre-selected level (120°F – 150°F).
- Cleaning with Detergent:
- At the designated time in the cycle (usually pre-wash), the detergent dispenser releases a measured amount of dishwasher detergent.
- Powerful Spray Action:
- The circulation pump forces the hot water and detergent solution through the spray arms located at the top and bottom of the dishwasher.
- The spray arms rotate, distributing the solution throughout the tub and ensuring all dishes are thoroughly cleaned.
- Rinsing and Drying:
- Once the cleaning cycle is complete, the dirty water is drained out through the drain hose.
- In some models, fresh water is drawn in for a final rinse cycle to remove any remaining detergent residue.
- Depending on the selected cycle, the heating element may activate again to assist with drying the dishes.
- Cycle Completion:
- Upon completion of the chosen cycle, the dishwasher automatically shuts off and unlocks the door.
- The user can then safely open the door and remove the clean dishes.
Note: This is a general overview of the dishwasher operation process. Specific details may vary depending on the model and chosen cycle. Always refer to the owner’s manual for specific instructions and safety information.
Signs Your KitchenAid Dishwasher Needs Cleaning
Cleaning your KitchenAid dishwasher on a daily basis will keep it working at its best. Did you know that a dishwasher that is dirty can clean less well by up to 50%? If you know how to clean a KitchenAid dishwasher, you can be sure that your dishes are always clean and germ-free. Here are some common signs your dishwasher is due for a thorough cleaning:
- Recurring filmy residue on dishes: This can be caused by hard water minerals, grease, or soap scum buildup.
- Unpleasant odors: This can indicate trapped food particles, mold growth, or even a plumbing issue.
- Visible signs of soiling: Look for caked-on food debris and grime in the interior, on the racks, or around the filter.
By learning how to clean stainless steel, the dishwasher filter, and your entire KitchenAid appliance, you can effectively address these issues and maintain proper dishwasher hygiene.
Preparation for Cleaning
Before you tackle the task of ‘How to Clean a KitchenAid Dishwasher,’ it’s essential to prepare by gathering the supplies you’ll need and taking certain safety precautions.
Gathering Necessary Supplies
- White vinegar
- Baking soda
- Soft-bristled brush or toothbrush
- Clean, dry cloth
- Sponge or scrubby
Safety Precautions
- Always unplug the dishwasher or turn off the power at the circuit breaker to avoid electric shock.
- Use gloves to protect your hands from cleaning agents and bacteria.
Cleaning the Interior
Steps to Clean the Interior of the Dishwasher
- Empty the dishwasher: Take all of the dishes and cooking tools out of the dishwasher.
- Inspect and scrape: Remove any solid debris from the bottom of the dishwasher. Use a plastic or wooden utensil to dislodge large debris from the drain area.
- Vinegar wash: Place a cup of white vinegar in the top rack. Run the dishwasher on the hottest setting without any dishes. The vinegar will remove odors and disinfect.
- Baking soda boost: Run a short hot water cycle after the vinegar cycle is over. Then add a cup of baking soda around the bottom of the dishwasher. These steps will get rid of any leftover waste and minimize smells even more.
Cleaning the Exterior
It’s important to keep your kitchen clean and germ-free, but as you’ll see in our guide on How to Clean a KitchenAid Dishwasher, the outside of your dishwasher can also be a magnet for fingerprints, spills, and drips. It’s not just about how it looks; keeping it clean also stops dirt and germs from building up.
Tips for Cleaning the Exterior Surface
- Use a damp cloth with mild soap or a cleaner designed for appliances.
- Avoid abrasive sponges or cleaners that could scratch the surface.
- Pay special attention to areas around buttons and the control panel, where dirt and grime can accumulate.
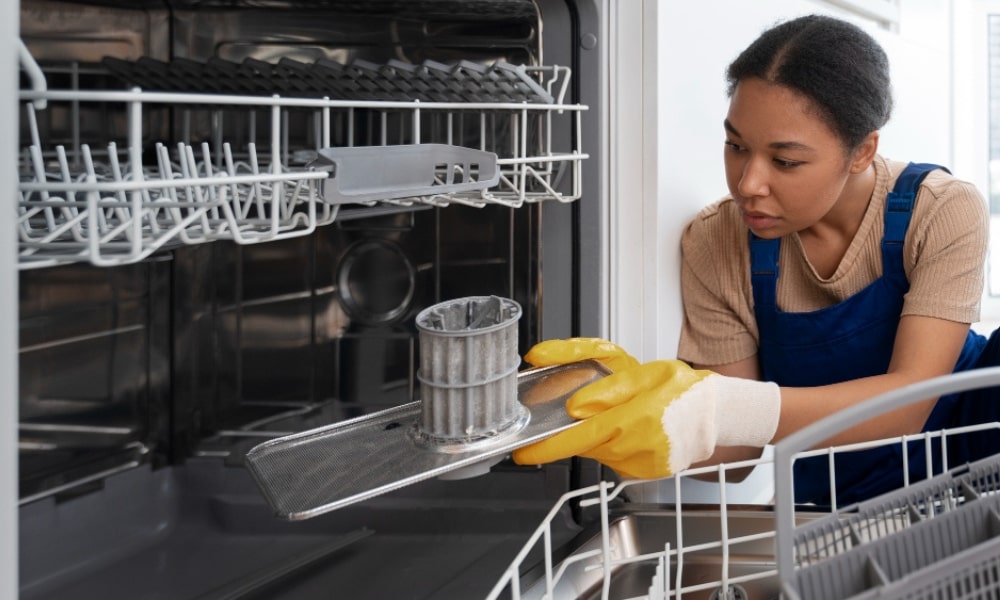
Cleaning the Filter
The filter is often overlooked but is crucial for keeping your dishwasher running smoothly.
Importance of Cleaning the Filter
The filter prevents food particles from getting recirculated onto clean dishes and ensures that the drain doesn’t get clogged.
Step-by-Step Process of How to Clean a KitchenAid Dishwasher
- Remove the bottom rack: This will give you access to the filter located at the bottom of the dishwasher.
- Unscrew and lift the filter out: Be prepared for some stagnant water if your dishwasher hasn’t been recently used or is clogged.
- Rinse the filter: Use warm, soapy water to wash away any food or grease. A soft brush can help with any stubborn build-up.
- Inspect and replace: Make sure there are no tears or holes that could allow food particles to bypass the filter.
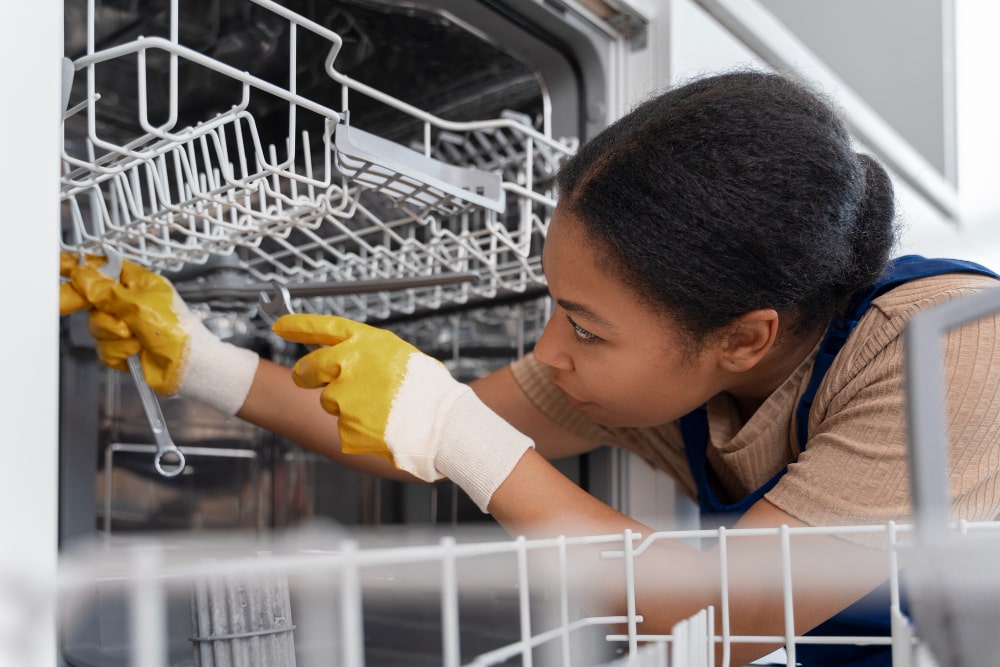
Cleaning the Spray Arms
The spray arms play a critical role in the cleaning process, and they, too, can become clogged and inefficient if not properly maintained.
How to Effectively Clean Spray Arms
- Remove the racks: You need access to the arms.
- Inspect for debris: Look for any food, paper, or hard water deposits that may be stuck in the spray holes.
- Use a toothpick or wire: Carefully remove any blockages. Be gentle to avoid enlarging the spray holes, which could alter the water flow patterns.
- Rinse and replace: Once the arms are clear, give them a rinse before putting them back in place.
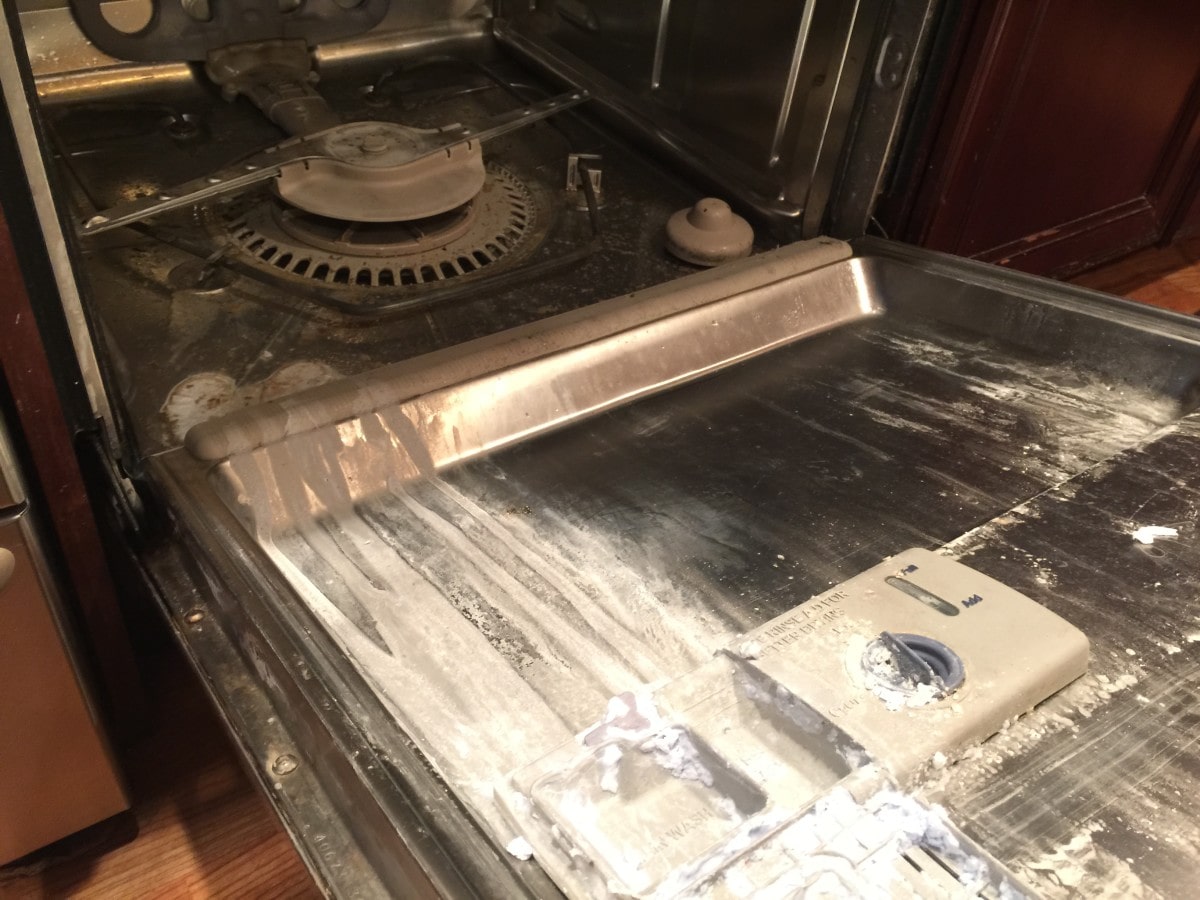
Dealing with Hard Water Deposits
If you notice white or chalky deposits on the interior surfaces of your KitchenAid dishwasher, these are signs of hard water. Understanding how to clean a KitchenAid dishwasher will help you get rid of these unsightly mineral buildups. Not only are they unsightly, but they can also affect the dishwasher’s performance over time. Regular KitchenAid appliance care, including cleaning the dishwasher filter and using products designed for hard water, will help prevent buildup. To keep your dishwasher cleaning effectively, try a specialized hard water cleaning product and consider cleaning the dishwasher filter regularly.
Solutions for Removing Hard Water Stains
- Vinegar soak: For areas with light deposits, soak a cloth in white vinegar and lay it over the affected area for an hour, then wipe away.
- Baking soda paste: For more persistent stains, make a paste with baking soda and water, apply it to the surface, and scrub gently.
Maintaining a Clean Dishwasher
Once your dishwasher is sparkling clean from following a guide on How to Clean a KitchenAid Dishwasher, it’s important to adopt a regular maintenance schedule.
Regular Cleaning Schedule
Plan to give your dishwasher a thorough cleaning every month, or more frequently if you notice it’s needed.
Preventive Measures
- Scrape dishes before loading to avoid food particles clogging the filter and spray arms.
- Use a rinse aid to prevent water spots and mineral deposits.
- Leave the door ajar after the last cycle of the day to allow the interior to fully dry and prevent mold growth.
Common Mistakes to Avoid
In your quest for a glistening dishwasher, it’s important to be aware of potential pitfalls.
Pitfalls to Watch Out For
- Using the wrong cleaning agent: Stick to gentle, dishwasher-safe cleaners and avoid harsh chemicals that could damage the interior.
- Overloading or blocking the spray arms: Make sure water can freely circulate around all items in the dishwasher for a thorough cleaning.
Troubleshooting
Sometimes, even with diligent cleaning, your dishwasher may not be running as smoothly as you’d like.
Addressing Common Issues Related to Dishwasher Cleanliness
- Poor draining: This could indicate a clogged filter or drain. Make sure both are clear and inspect the drain hose for kinks or blockages.
- Persistent odors: If odors persist after cleaning, it could be a sign of mold. Inspect the interior and gaskets for visible signs of mold growth and clean with a mildew remover, if necessary.
Additional Tips and Tricks
Enhance the performance of your dishwasher with a few extra measures.
Enhancing Dishwasher Performance
- Install a water-softening system to reduce mineral deposits and extend the life of your dishwasher.
- Regularly inspect and refill rinse aid levels to improve drying and prevent spotty dishes.
Read one of our most popular Blog
Learn the Secrets of How to Prevent Slime in the Ice Machine
Conclusion
The process of keeping your KitchenAid dishwasher clean is pretty easy and has big benefits. By spending a little time each month following these simple steps on how to clean a KitchenAid dishwasher, you can make sure that it lasts longer, works better, and stays a trusted part of your home for many years to come. Don’t just clean the parts you can see; clean the parts that do the work too. Your food and kitchen will be glad you did it.
FAQs
- How often should I clean my KitchenAid dishwasher?
It’s recommended to clean your KitchenAid dishwasher once a month to maintain optimal performance. - Can I use vinegar to clean my dishwasher?
Yes, vinegar is an effective and natural cleaner for removing mineral deposits and odors from your dishwasher. - Do I need to clean the dishwasher filter regularly?
Yes, cleaning the dishwasher filter regularly is essential to prevent clogs and maintain efficient drainage. - How do I fix my dishwasher if it’s not cleaned right?
If your dishwasher isn’t cleaning properly, check for clogs in the spray arms, filter, and drain, and ensure that the water temperature is adequate. - How can I prevent hard water stains on my dishes?
Using a water softener and adding a rinse aid to your dishwasher can help prevent hard water stains on your dishes.